
Dee’s Little Kichn has affiliate partnerships so we may receive compensation for some links to products.
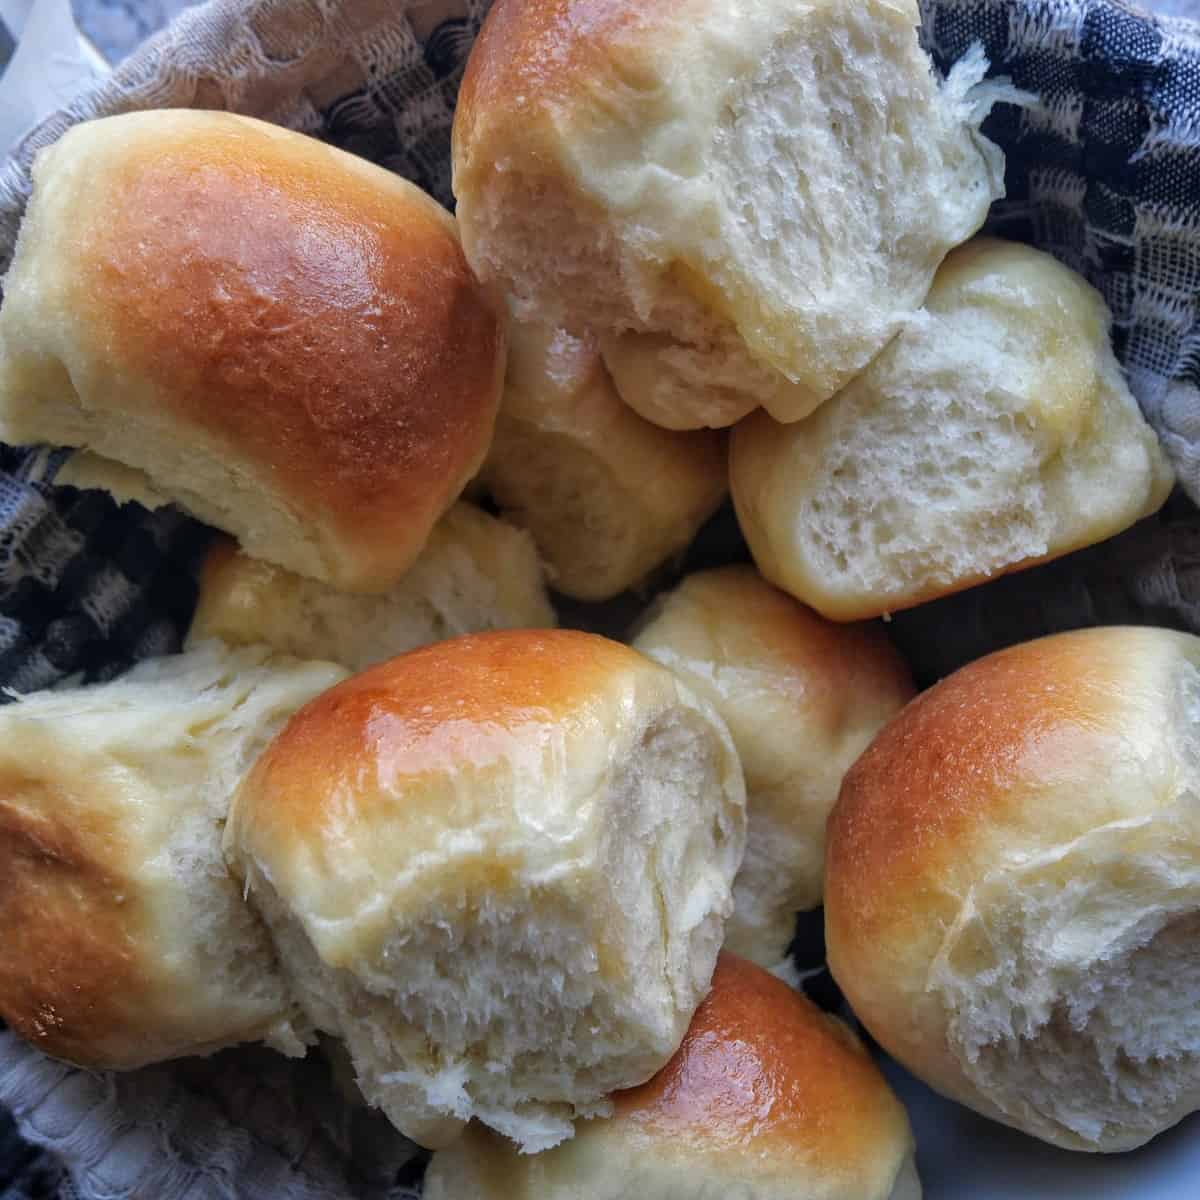
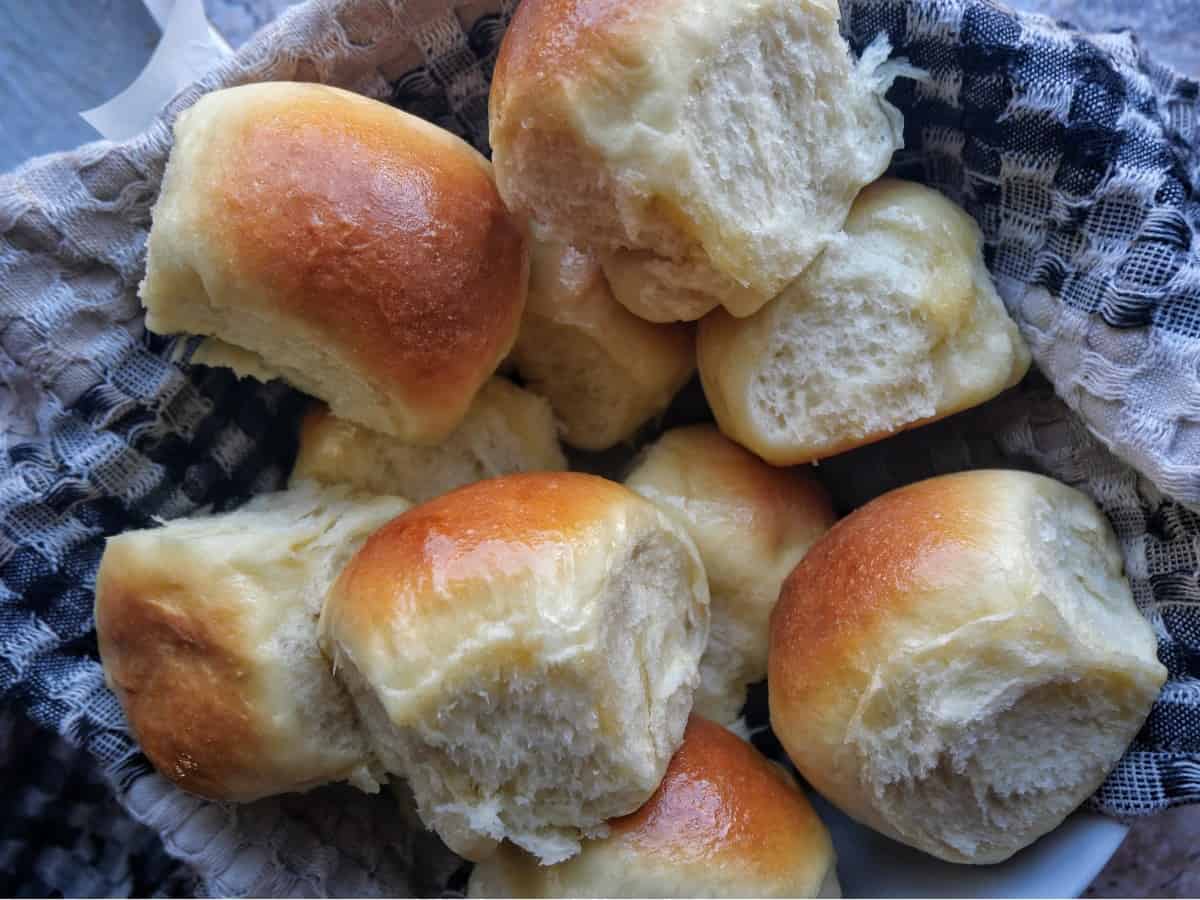
These homemade soft dinner rolls are fluffy, buttery, and only require seven ingredients that you probably already have at home.

Need more Thanksgiving Side Dishes? Here you go:
Soft Dinner Rolls Ingredients

Here’s everything you’ll need (which literally isn’t a lot):
King Arthur AP Flour: This high protein flour is perfect for these dinner rolls. I’ve also tested this recipe with Trader Joe’s All-Purpose Flour and it came out great!
 </a
</a
Milk: Warmed
Unsalted butter: Melted
Active dry yeast: To help the dough rise
Granulated sugar: To feed the yeast
Egg yolks: For richness
Kosher salt: For flavor
How to Make Soft Dinner Rolls
Here’s how to make these delicious rolls:
Step 1: Make your dough
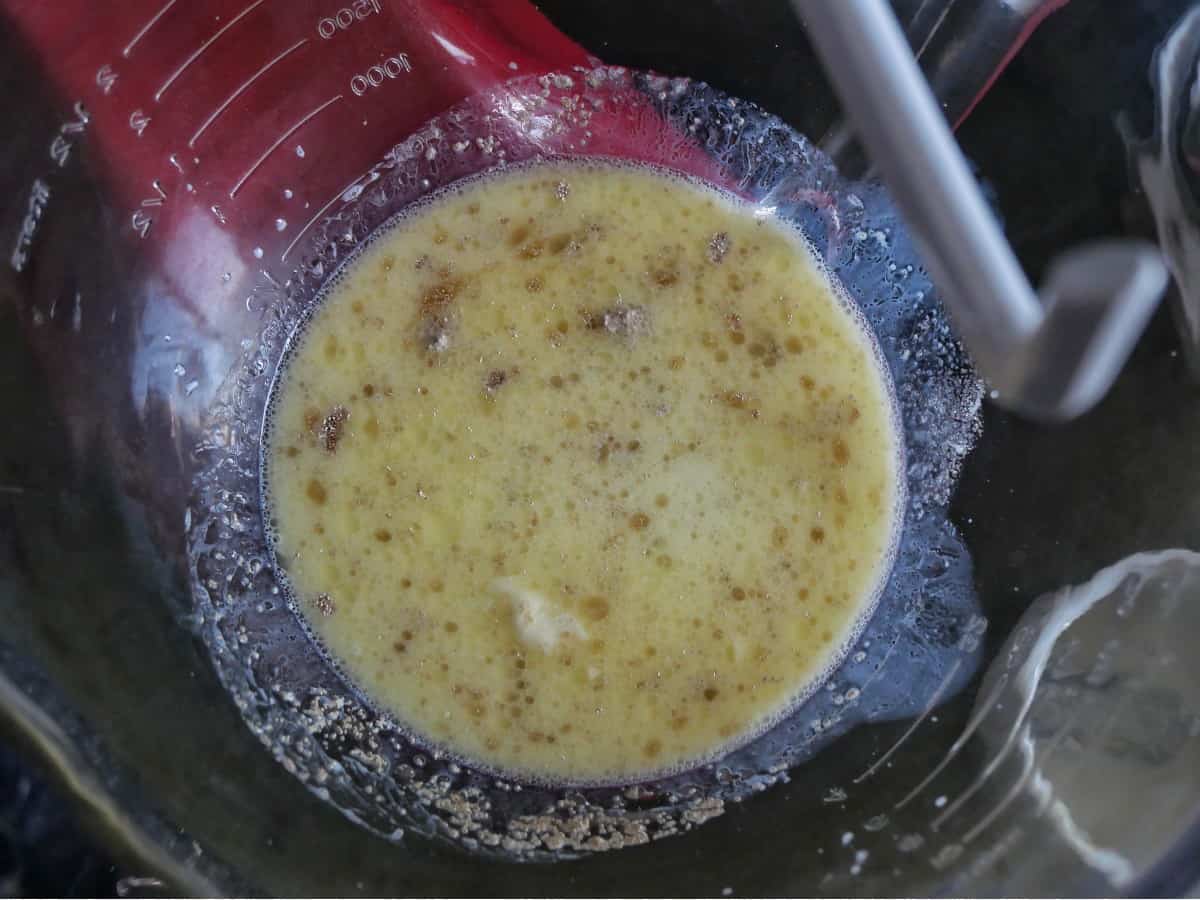
To the bowl of a standing mixer add the warmed milk, melted butter, 1 tablespoon of the sugar, and the yeast. Mix together and let sit for 5 minutes.
Once the 5 minutes are up, add the eggs, salt, remaining sugar, and ⅓ of the flour. Mix on low, until the flour is incorporated, and then add the remaining flour. Turn the speed up to medium and continue to mix for ~2–5 minutes, or until the dough pulls away from the sides of the bowl. It should be slightly tacky. If the dough looks too wet, you can add a TBS of flour at a time until it’s supple, but not wet.
Step 2: Let the dough rise.

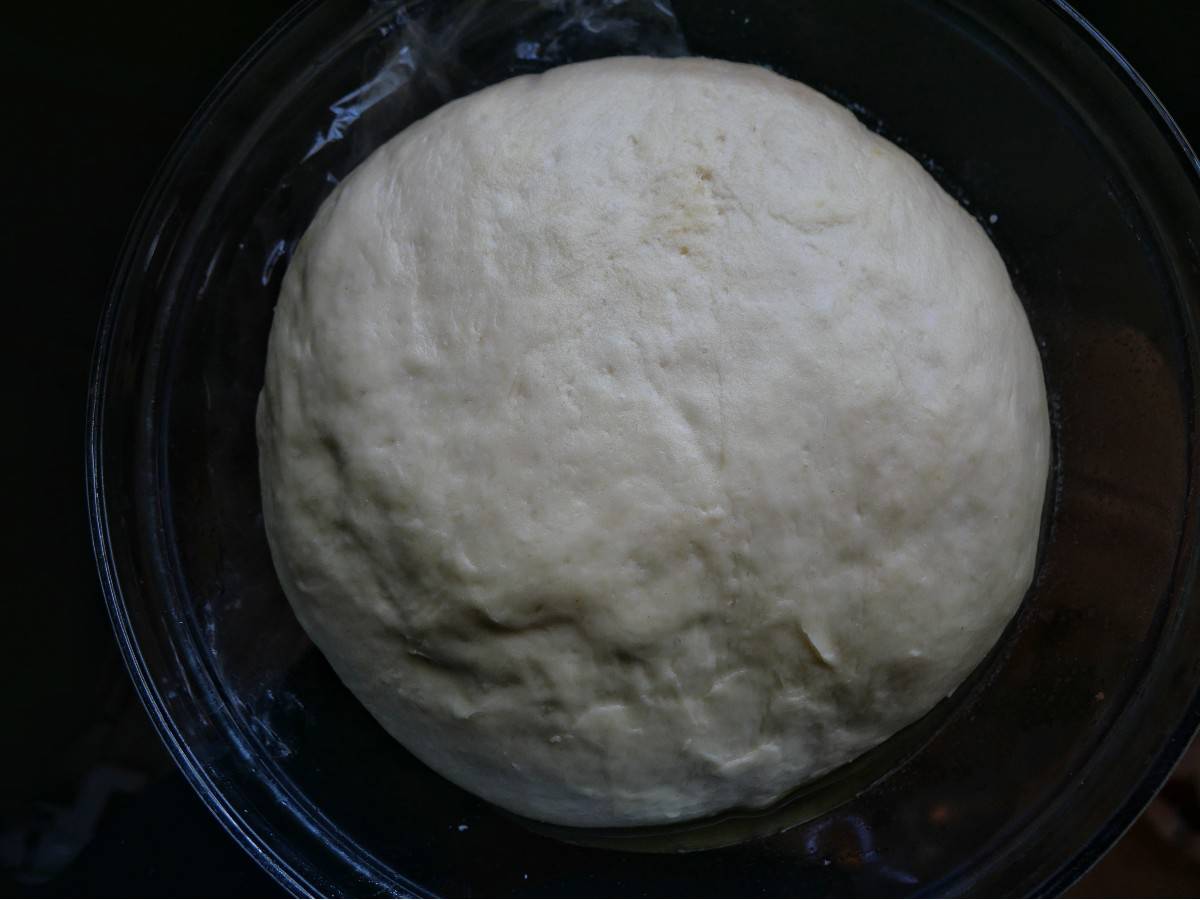
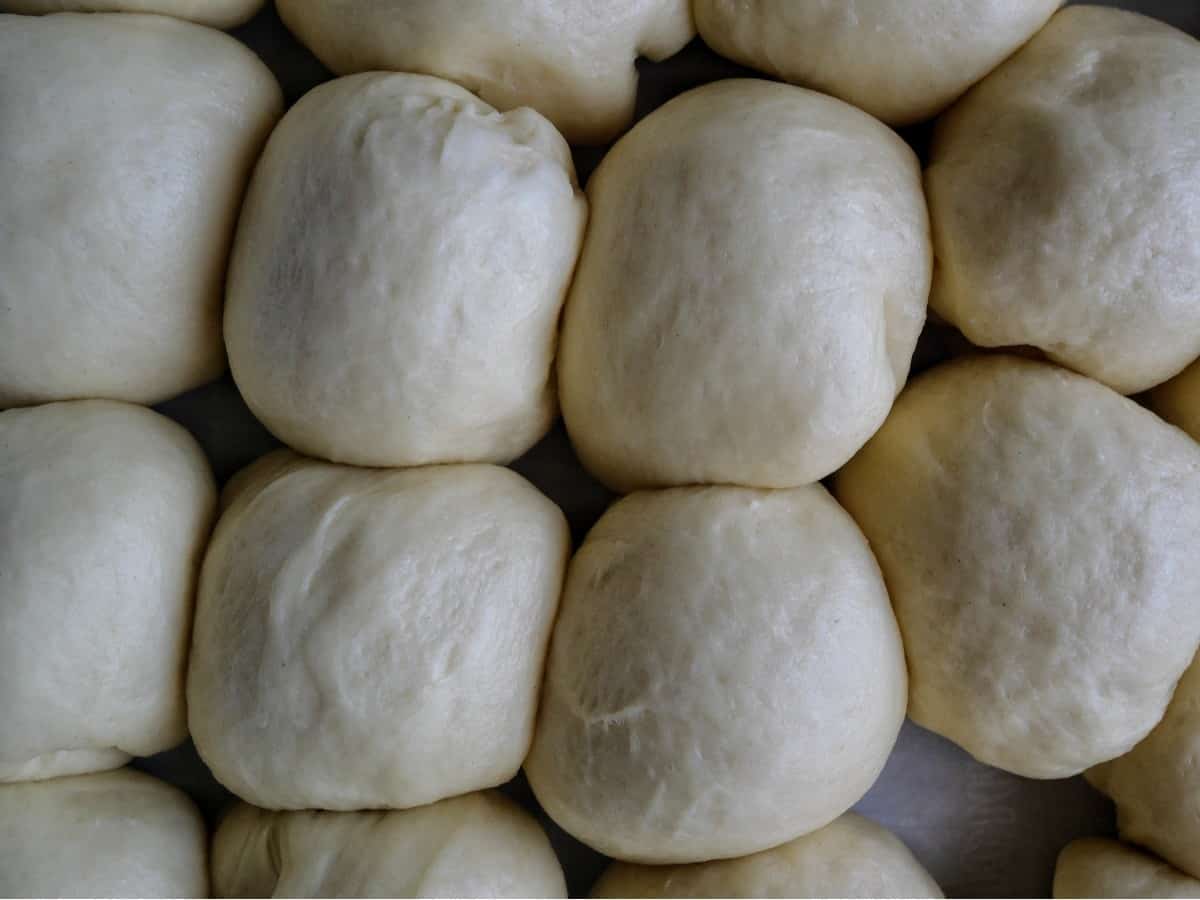
Oil a bowl and set it aside. Pour the dough onto a lightly floured work surface and knead it just a bit so that you can form a ball. Add it to the oiled bowl, seem side down, and drizzle a bit of olive oil on the top, rubbing it all around the dough. Cover with plastic wrap and a kitchen towel and let rise in a warm area (I use the inside of my oven with the light turned on) until doubled in size (about 3 hours). It should look like this:
Note: Because this dough is “heavier” (meaning it has eggs, butter, milk, etc.) it takes longer to rise than you may be used to. Keep this in mind when planning (and I always use multiple kitchen towels to keep it warmer).
Step 4: Make the dough balls.
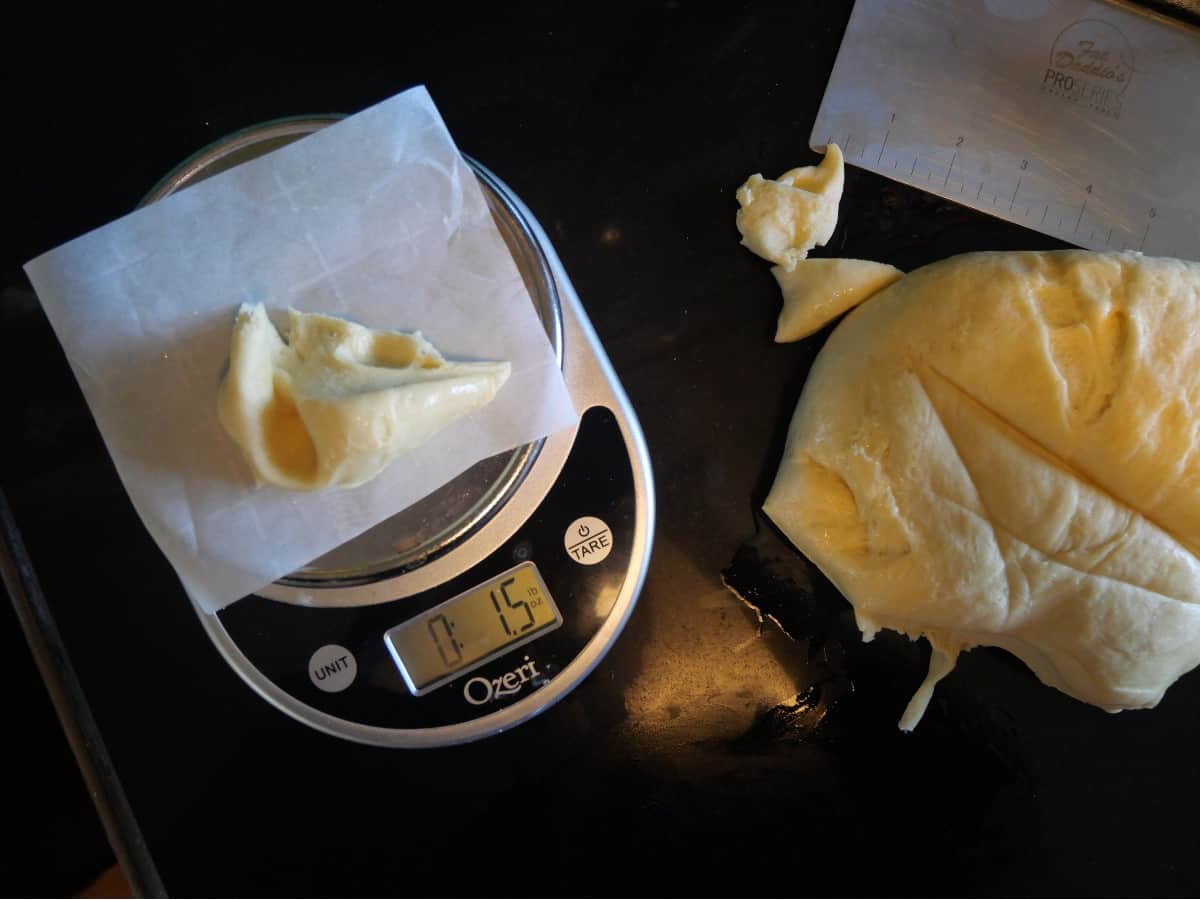
Now punch the dough down to deflate it a bit and add it to your clean work surface. Make sure to have a 9×13 pan lined with parchment paper ready to go.
Working relatively quickly, measure out 1.5oz dough and form it into a ball, then add it to your baking dish. If you don’t have a scale, no worries, just divide the dough into ~20 balls.

Step 5: Perform the second rise.
Now cover the dough balls loosely with plastic wrap and a couple of kitchen towels. Let rise at room temperature for a second time. The balls should just about double in size and touching. This should take about an hour or two. In the meantime, preheat the oven to 375 degrees F.
Step 6: Bake the dinner rolls.
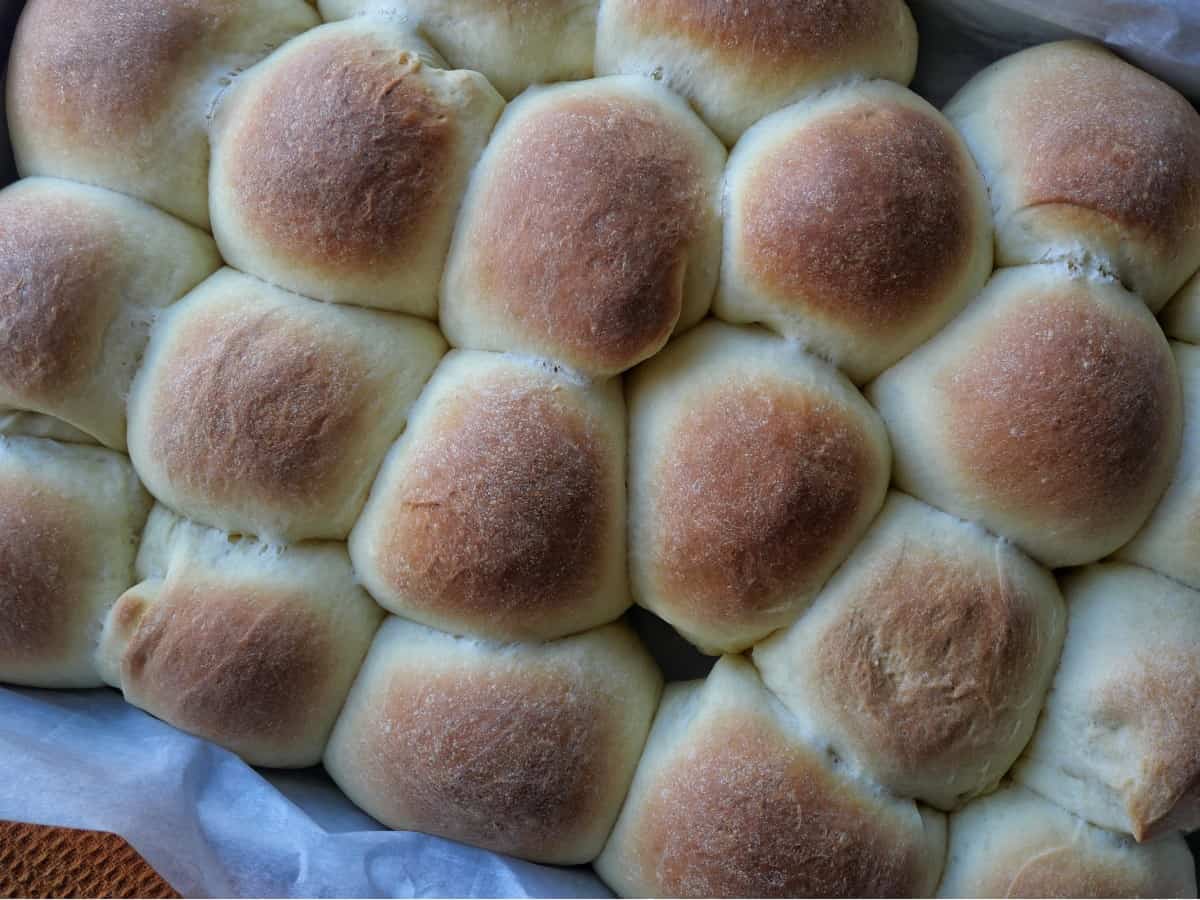
Now bake the rolls for about 20 minutes or until the tops are nicely browned, rotating the baking sheet halfway.
Step 7: Brush the rolls.
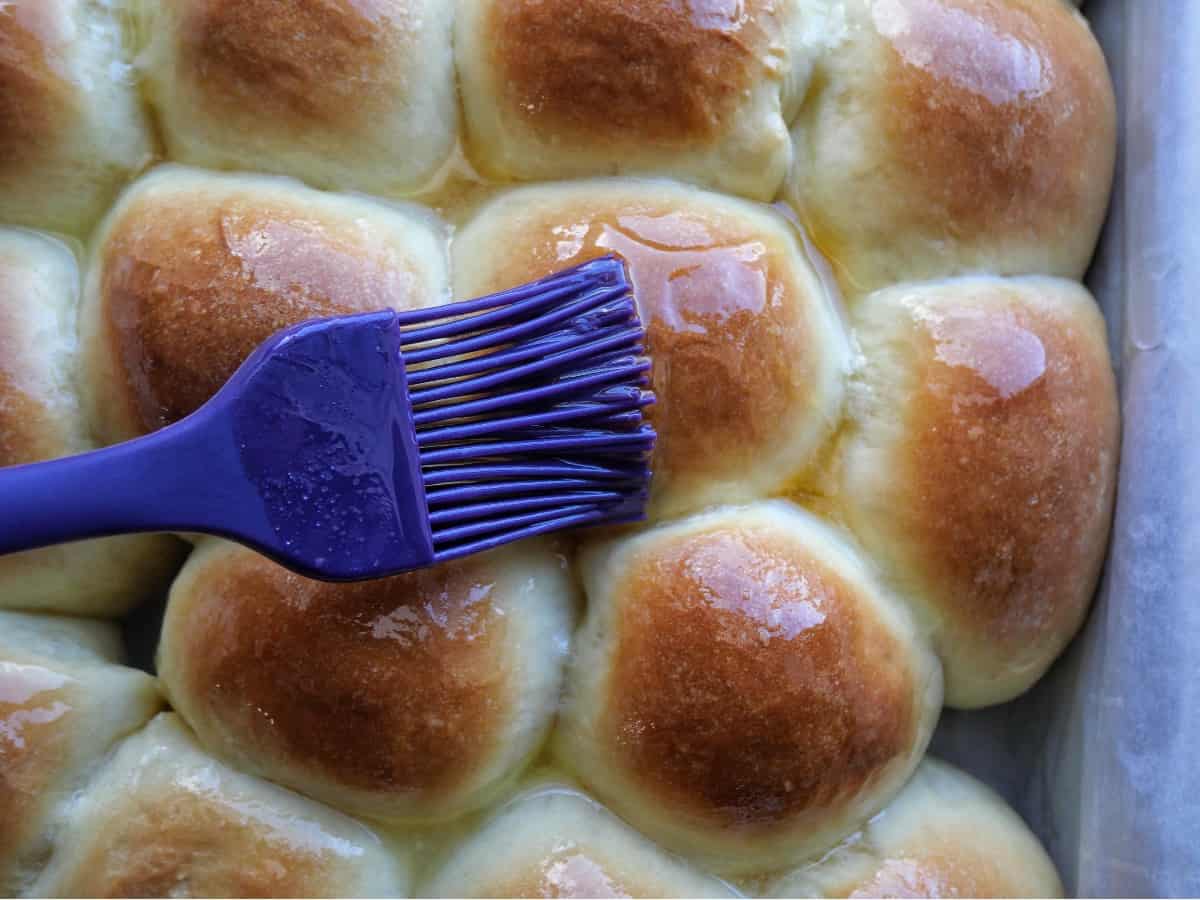
Once the rolls are out of the oven, brush them with your topping of choice! For this I did 2 tbs of butter with a pinch of salt and some honey, but you can get as creative as you’d like (I think butter with some finely chopped herbs with be delicious!).
How to Make These Dinner Rolls Ahead of Time
If you want to make these in advance, you can go through to the second rise. So, perform the first rise, then roll out the dough balls and add them to the baking dish. Now, cover tightly with plastic wrap and leave in the refrigerator. In the morning, take the rolls out to rise about 3 hours before you want to bake them. Once risen, bake as directed!


Dee
Let me know if you have any questions!
Alyssa Wolf
Hi! This recipe looks delicious and I am excited to try for Thanksgiving!
Have you tried making the rolls the day before and baking the day of? Trying to prep as much before Thanksgiving as I can!
Dee
Hi Alyssa! I just tested this and yes you can! Do everything up until the second rise. So after the first rise, roll them into balls and put them in the baking pan. Cover tightly with plastic wrap and leave them in the refigerator. Take them out to rise a few hours before you’re ready to bake!
Alyssa Wolf
Amazing, thank you!!
Rob
I made these rolls on Thanksgiving and they were the hit of the meal! Thank you for sharing your love of cooking with us
Deb
These are so yummy! I made them to use for small ham sandwiches for my daughter‘s lunch and they are the closest bread I’ve found to Jimmy John’s bread! I highly recommend these!
Dee
Woohoo!! Thanks so much Deb! That sounds yummy!
May
Hi! How would I go about mixing the ingredients together if I don’t have a stand mixer? Thanks!
Dee
Hi May! You can absolutely do it by hand with a wooden spoon, it’ll just take a bit longer. Once it comes together, I’d dump it on to a clean work surface and knead it until it reaches the consistency (tacky).
Rob
I made them by hand as I don’t have a mixer. Like Dee states, it does take longer to come together, but still produces amazing results
Elle
Have you frozen this dough with good results?
Dee
I haven’t tried to freeze them 🙁
Katherine Doyle
Hi! I made them, they were great but they had a little bit of a thick/hard top is there a way I can fix this?
Dee
Oh that’s so strange! I’ve made them multiple times without that happening, hmmmmm. Did you use King Arthur flour? Liquid has to be adjusted slightly if using a different brand.
Kaitlynn
Hi,
If I wanted to make these but I’m traveling 90 mins for the meal would you recommend letting them do their second rise at home and baking on arrival? Or would you recommend baking at home and just heating them up in the oven to serve warm?
Thanks!
Dee
So I’m making these for a Friendsgiving and my plan may work for you! I’m going to make them the night before and do everything UP UNTIL the second rise. So after I roll them into the small balls I plan on putting them in the baking pan, covering in plastic wrap, and leaving in the refrigerator. Then I’ll take them out and have them rising in the car while I’m driving to my friends. Since they’re being refrigerated they take a bit longer to rise anyway (need to come to room temp). Then I’m baking at my friends once they’ve finished rising! I’ve already tested them with the overnight method, and they worked great!
Kaitlynn
Great! Thanks so much. Looking forward to trying them 🙂
Silas
Having a hard time finding King Arthur flour. I have gold medal. What would you suggest the liquid ratio for this one?
Dee
I’d reduce the liquid slightly to ensure the dough isn’t TOO wet — OR just have extra flour close by and add a bit (like a few TBS at a time) if the dough seems too wet until it reaches a supple and tacky consistency. Once you remove it to knead it on a floured work surface, you can just add a touch of flour at a time to form your dough ball.
Silas
Thanks so much!!
Harley
Help. I can’t stop making these rolls. Made them for Thanksgiving dinner and have made them twice since. I think I’m in love with you lol. Tonight I put garlic butter with herbs over the top and almost died
Dee
HAHAHAHA HARLEY!!! I’m so happy to hear this. And GARLIC BUTTER WITH HERBS? That sounds heavenly.
Hannah
Loved these rolls! I made them for thanksgivng the day before by following the steps as directed up until the second rise. I rolled them up, let them sit in the frige over night, let them rise for 2 hours the second day at room temp and they turned out great. I also used gold medal ap flour which gave me good results but I had to atleast use a cup or more of flour but overall, would make these again!
Dee
So glad you enjoyed them! Yes, whenever you use a different brand of flour from the recipe the ratios can be a little off. So glad it worked out!!